Sometimes, you don’t need to create one SharePoint site collection, you need to create multiple site collections in bulk.
To achieve this we will need to follow the steps below:
- Install SharePoint Online Management Shell
- Create a CSV file with all the site collections you want to create
- Connect to your SharePoint Online tenant
- Create the site collections
In this blogpost, we will be using the SharePoint Online Cmdlets, not the SharePoint PnP Cmdlets.
PnP PowerShell Cmdlets contains additional parameters to each command, which is used to achieve more tasks when compared to equivalent SPO command.
Install SharePoint Online Management Shell
Open PowerShell ISE as administrator. You need open it as administrator if you need to install the SharePoint Online Management Shell module.

Check if you have already installed SharePoint Online Management Shell by executing following command:
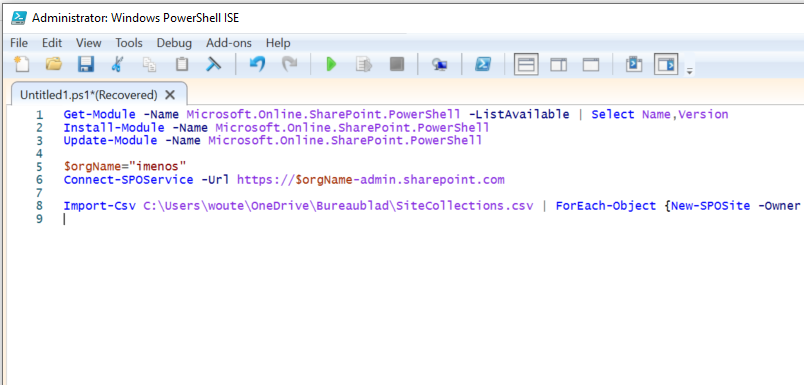
Get-Module -Name Microsoft.Online.SharePoint.PowerShell -ListAvailable | Select Name,VersionIf you don’t have it yet, install it by executing following command:
Install-Module -Name Microsoft.Online.SharePoint.PowerShell
If you already have it, update it:
Update-Module -Name Microsoft.Online.SharePoint.PowerShellYou have installed the module. This is required to be able to execute SharePoint Online commands from PowerShell.
Create CSV file
We need to define which site collections we want to create. We will do this in Excel and save our list as a CSV file that can be used from PowerShell.
Create an Excel file and add following columns to it:
- Owner
- StorageQuota
- Url
- ResourceQuota
- Template
- TimeZoneID
- Name

Save your Excel file as CSV.
Check if the CSV file values are separated with a comma and not with a semicolon.

If you have semicolons, you can replace them with CTRL+H using Notepad, or you can change the separator in your Windows settings.
Connect to your SPO tenant
Before we can execute the command to create the SPO site collections, we need to establish a connection between PowerShell and our SPO tenant.
Execute following commands. Don’t forget to fill in your organization name or you will receive a connection error.
$orgName="Your organization name"
Connect-SPOService -Url https://$orgName-admin.sharepoint.com
A window will pop-up where you need to fill in your email address, password and MFA details if you have MFA activated.
You need to have the right role to create new SharePoint site collections. (SharePoint Administrator)

If you have MFA enabled, you need to approve it on your phone or fill in the MFA code.

After these steps, you have established a connection with your SPO tenant and can start creating the site collections.
Create the site collections
To create the site collections you need to execute the command below. Don’t forget to change the path to your CSV file.
Import-Csv C:\Users\woute\OneDrive\Bureaublad\SiteCollections.csv | ForEach-Object {New-SPOSite -Owner $_.Owner -StorageQuota $_.StorageQuota -Url $_.Url -NoWait -ResourceQuota $_.ResourceQuota -Template $_.Template -TimeZoneID $_.TimeZoneID -Title $_.Name}
After you executed the commands, your sites will be visible in the SharePoint Admin Center:
