Sometimes you want to re-use an instant flow on multiple SharePoint Online lists or document libraries. This blogpost explains how to do this without recreating a new flow for every list or document library.
Important to know is that we use premium actions for this workaround that require premium licensing. In this blogpost, we use a “instant” flow. The behaviour and/or licensing for other types of flows (for a selected item/file) can be different because there we maybe don’t need the HTTP action.
Vote for the idea “Associate Flow with a SharePoint Content Type” for a content type based trigger.
Out of the box Power Automate triggers
Power Automate has two out of the box triggers, one for a document library and one for a list. Both triggers allow you to start a flow for a selected item or file. The disadvantage is that you can only define a single site or library/list in the properties of the trigger.
- For a selected file
- For a selected item
For both triggers, you get a side window in SharePoint Online to provide more information (if necessary) before running your flow.

Workaround to connect a flow to multiple lists or libraries
Sometimes you need to connect a flow with many libraries or lists within multiple SharePoint sites.
In our example, we use an “instant flow”. For another type of flow, that uses the “for a selected item/file” trigger, within the configuration options of the out of the box Power Automate triggers, you can only define one SharePoint site or list. After testing it became clear that the flows can also be triggered from other (multiple) locations, without defining the URL in the trigger configuration options. We don’t test this in this blogpost.
Our workaround works as follows. For the example, we are using an “instant flow”, not the “for a selected file/item” triggers.
- SharePoint column formatting to trigger the instant flow
- An instant flow that triggers another flow with a HTTP request
- A main flow that is triggered by the HTTP request of the previous flow
Why a second flow with a HTTP request? You will read more about the “why” later in this article, below already some extra information.
- Because Power Automate acts strange when you add a SharePoint action to the instant flow. The HTTP action is a second workaround to circumvent the error when adding a SharePoint action to the triggered instant flow.
- We use a HTTP action and not a child flow because the instant flow cannot be in a solution package and must be in the default environment. When you put the flow in a solution package or in a non-default environment, it does not get triggered. You can also not trigger child flows from a flow outside a solution package at this moment (April 2021).
Column formatting button to trigger an instant flow
In the SharePoint list below, we have a “Start Approval” column that doesn’t contain a value but has a button created with column formatting. The code can also be found below.

The “Start Approval” button can be hided by adapting your column formatting code, for example when a “Status” column gets the “In progress” status. I haven’t added this to my code for this example.

The ID in the “actionParams” parameter needs to be replaced later by the flow ID that you will create in the next step.
{
  "$schema": "https://developer.microsoft.com/json-schemas/sp/v2/column-formatting.schema.json",
  "elmType": "button",
  "customRowAction": {
    "action": "executeFlow",
    "actionParams": "{\"id\": \"0aa2105b-755e-4017-aac8-b1b823ea96d1\"}"
  },
  "attributes": {
    "class": "ms-fontColor-themePrimary ms-fontColor-themeDarker--hover"
  },
  "style": {
    "border": "none",
    "background-color": "transparent",
    "cursor": "pointer"
  },
  "children": [
    {
      "elmType": "span",
      "attributes": {
        "iconName": "Flow"
      },
      "style": {
        "padding-right": "6px"
      }
    },
    {
      "elmType": "span",
      "txtContent": "Start Approval"
    }
  ]
}
Instant flow triggered by the column formatting button
Create a new instant flow. This flow must be in the default environment and cannot be in a solution package at this moment, it’s a limitation (April 2021). Save and run the flow so that you can copy the output “Body” of the trigger. You need this for the “Parse JSON” action.

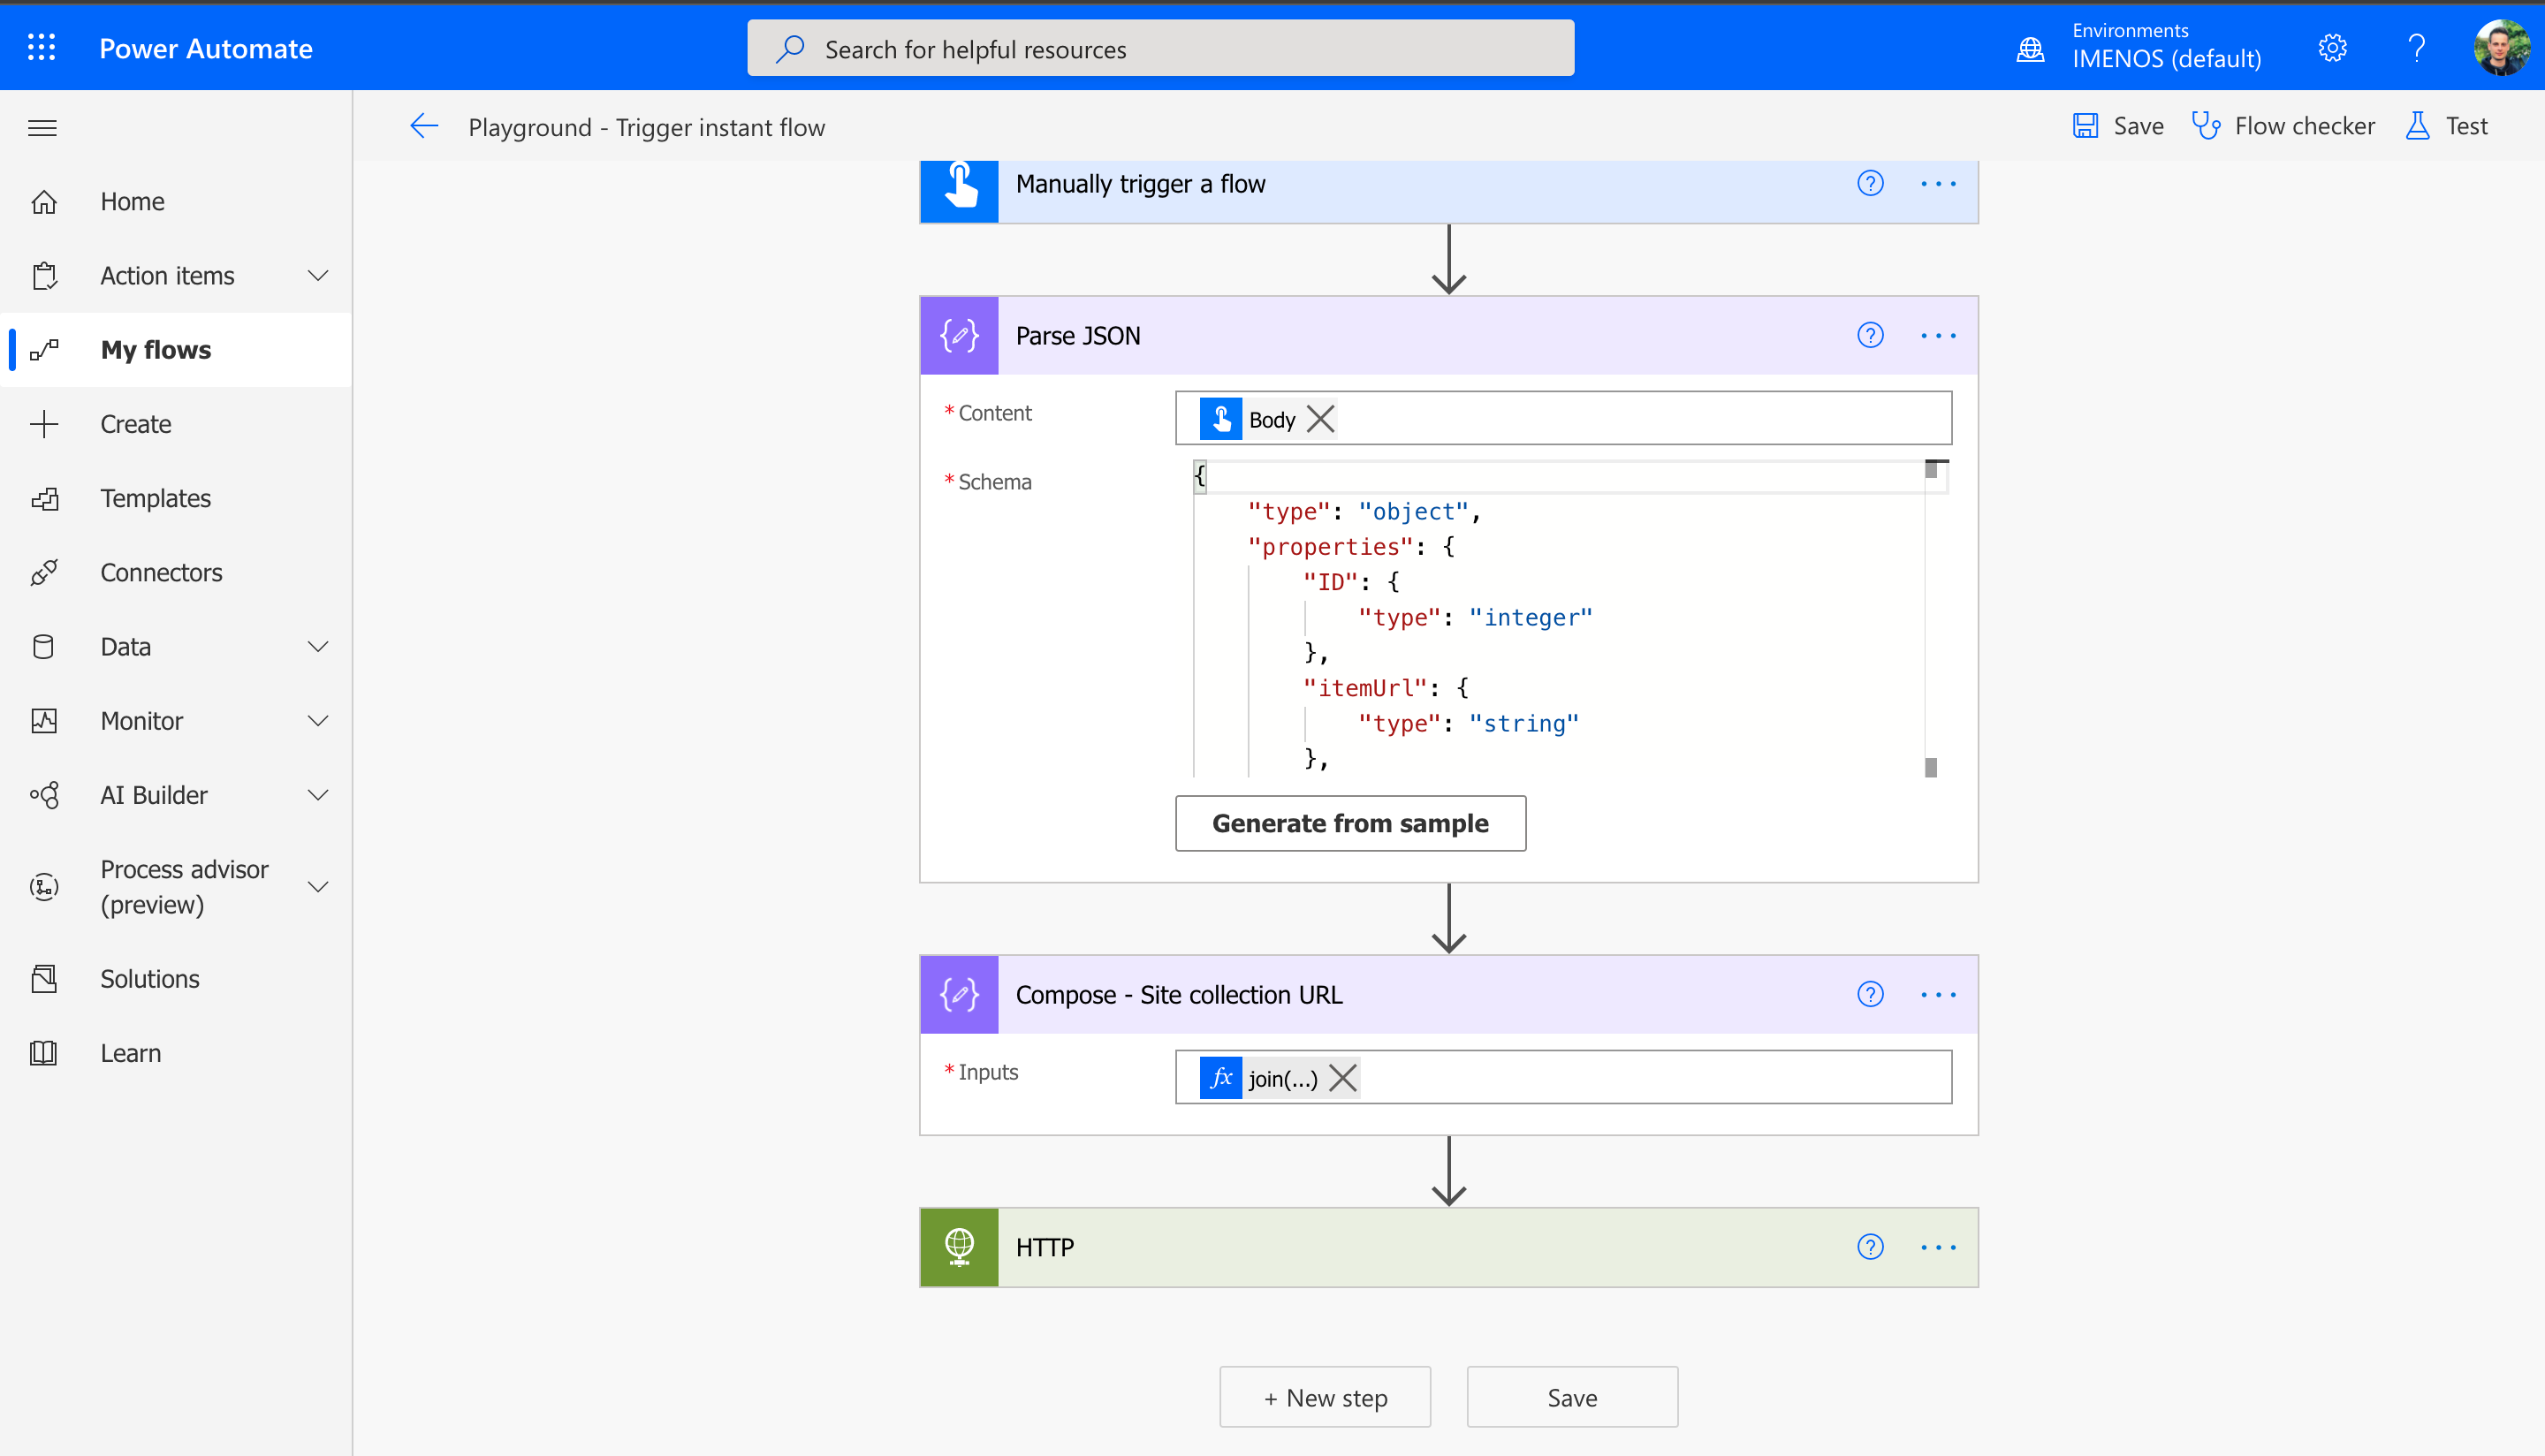
Complete the Parse JSON action below. In “Content” you need to add the “Body” output of the trigger action “Manually trigger a flow”. In “Schema” you need to click “Generate from sample” and add the output of what we copied before to generate the schema.

If you want to get metadata from your list item/file in the main flow, you also need to pass the URL of the site collection via the HTTP request.
To get the site collection URL, you can use for example following expression. Why? Because the “itemUrl” returns the link to the item, not the link to the site collection.
join(take(split(body('Parse_JSON')?['itemUrl'],'/'), 5),'/')
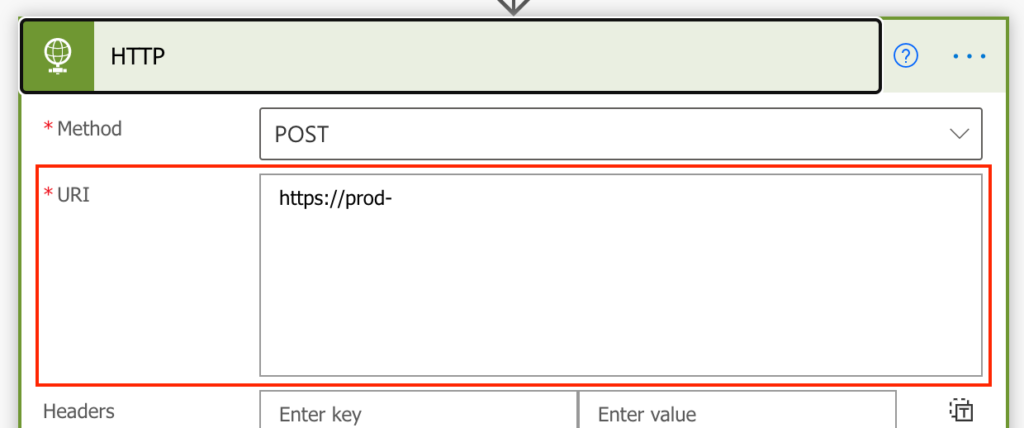
Last step of this flow is to use the HTTP action to trigger a main flow. If you put a SharePoint action directly in this flow, you will get an error.
See the screenshot below to see how you can fill in an HTTP action. The URI needs to be completed based on the auto-generated URL that you will create in the next step.

After saving your flow, you need to copy the flow ID and change the column formatting code. Don’t forget this.

Paste the URL into the column formatting code:

Main flow triggered by HTTP request
As mentioned before, we need to create a new flow to use SharePoint actions without errors.
The trigger of our main flow will be “When a HTTP request is received”.
This flow does not need to be in the default environment and can be created in a solution package.

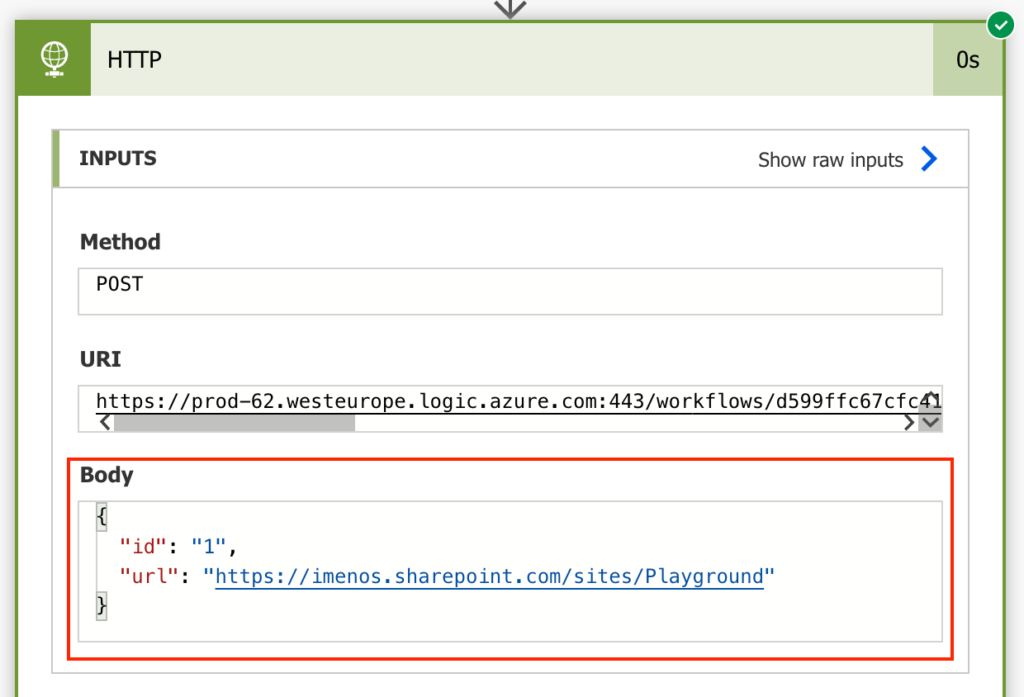
You need to generate a new URL, copy that URL and add it to the previous flow HTTP call:
Back to our new flow now. The “request body JSON schema” can be generated based on the “Body” output of the HTTP action of the previous flow or you can copy my code.
{
    "properties": {
        "id": {
            "type": "string"
        },
        "url": {
            "type": "string"
        }
    },
    "type": "object"
}
Click “Use sample payload to generate a schema” if you want to create it yourself.

To get the item in your SharePoint list or library, you need to fill in the URL and ID parameter in the “Get item” or “Get file” SharePoint action. If the dynamic value ID doesn’t show up, use a “Compose” action to copy paste it into the “Id” field of “Get item”.

The complete main flow looks like below.

You can continue your logic in this flow based on your use case.
Deploying to multiple lists or document libraries
To connect your flow to multiple lists or libraries, the only thing you need to do is to copy the JSON column formatting. Make sure that the structure of the list or library is equal everywhere.
Conclusion
This workaround is not straightforward, but it can save you a lot of time because you don’t need to create copies of your flow for every single list or library.
Please vote so that Microsoft adds a content-type based trigger for Power Automate, this will solve the problem for many use cases.
Hello, your solution seems very elegant and useful – however it doesn’t seem to work, in that when the button is clicked, you see “Setting up” and “Waiting”, but the workflow is never called. My solution is in the default environment and not in a Solution.
Hi Chris, did you fill in the correct ID after defining the column formatting?
Really struggling to follow these instructions however i need the result! There are a couple of steps that require the flow to be saved in order to get a URL or ID and this is not possible without the flow being finished?
What am i doing wrong here
Hi Sam,
Indeed, you first need to save the flow before you can get the ID. Let me know if it worked for you.
Hi Wouter,
Inspired by content like this, we developed a product to deploy a single Flow to any SharePoint site/library/list across a tenant 🙂
Would love to hear your thoughts on this?
https://www.encodian.com/products/trigr/
It can also collect user input to use in the automation via a dynamic form and we’re about to release Azure Directory based security trimming too. Happy to give you an account if its of interest….
Hi Wouter,
My first instant flow is working fine but the second main flow is failing in the Get items action with the below error.
The ‘inputs.parameters’ of workflow operation ‘Get_items’ of type ‘OpenApiConnection’ is not valid. Error details: The resolved string values for the following parameters are invalid, they may not be null or empty: ‘dataset’, ‘table’
Hi Wouter,
I am getting the list item details in parse json. But How are we passing the the properties to the http action in the instant flow?
Thanks for the article. It would be great if you could update this post as quite a few images are broken and not loading.